
Crafting a perfect coffee at home is a rewarding experience, but achieving silky, café-quality microfoam requires technique and practice. Using the Breville Barista Express, you can elevate your coffee game to barista-level excellence. If you’ve struggled with foamy bubbles or burnt milk, don’t worry—this step-by-step guide will help you master the art of milk steaming. Uncover the brewing precision of the Breville Dual Boiler BES920XL review
Understanding the Breville Barista Express Steam Wand
The Breville Barista Express is a top-rated espresso machine, praised for its ability to deliver rich espresso and velvety milk foam. Its steam wand, featuring a 360-degree swivel, is designed for flexibility and precision. Learn how this model blends convenience with innovation in the Breville Barista Touch Impress review
Key Preparations:
- Preheat Your Machine: Wait for the indicator lights to confirm it’s fully heated. Rushing this step can result in inconsistent foam.
- Purge the Steam Wand: Before starting, turn the steam knob briefly to release any residual condensation. This ensures dry steam, crucial for smooth microfoam.
Choosing the Right Milk for Perfect Foam
The type of milk you use significantly impacts your results. Here’s a breakdown:
Dairy Milk Options:
- Whole Milk: Preferred for its higher fat content, which creates rich and creamy foam with a velvety texture.
- Skim Milk: Produces lighter, airier foam but lacks the creaminess of whole milk.
Plant-Based Alternatives:
- Oat Milk: Barista-grade varieties work best, producing a consistent and creamy foam.
- Almond and Soy Milk: These options can foam, but results vary based on the brand and composition.
Pro Tips:
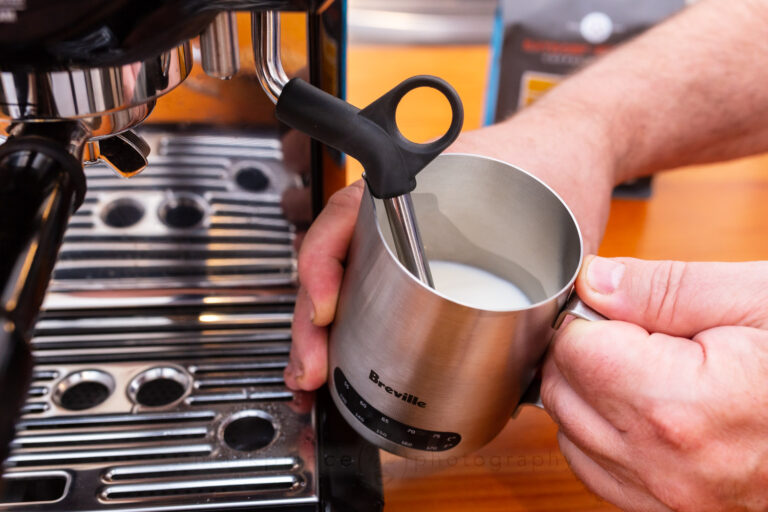
- Use a stainless steel milk jug for better heat conduction and easy temperature monitoring.
- Fill the jug no more than one-third full with cold milk to allow room for expansion and avoid overheating.
Step-by-Step Guide to Steaming Milk
1. Purge the Steam Wand
Before steaming, purge the wand again to ensure dry steam. This step prevents watery steam from affecting the milk texture. Compare these top models to find your perfect match in the Breville Barista Express Impress vs Pro review
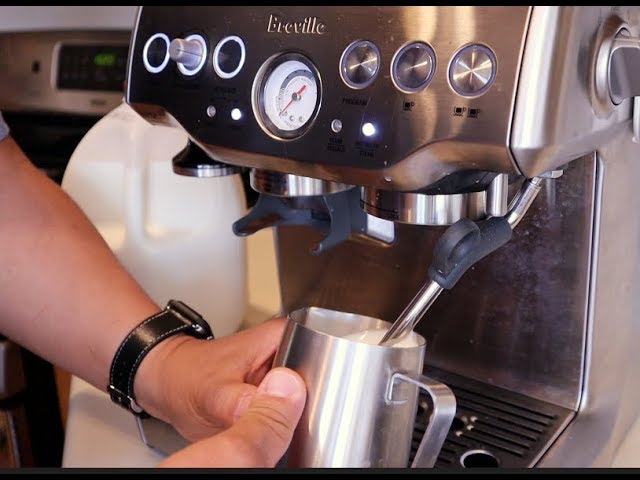
2. Position the Steam Wand
Insert the wand tip just below the milk's surface, positioning it near the jug’s spout. Tilt the jug slightly to encourage a whirlpool motion, essential for consistent foam. See what makes these machines stand out in the Breville Barista Pro vs Express review
3. Incorporate Air (Stretching the Milk)
Turn the steam knob to full power and listen for the hissing sound. Keep the wand tip near the surface for 3–5 seconds to introduce air. Be cautious—too much air creates large, unwanted bubbles. Explore the key differences between these premium machines in the Breville Oracle vs Oracle Touch review
4. Texture the Milk
Raise the jug slightly to submerge the steam wand fully. This phase involves heating the milk while maintaining a whirlpool action. The whirlpool smooths out bubbles and creates a shiny, creamy foam resembling wet paint.
5. Monitor the Temperature
Feel the jug’s side to gauge the milk’s temperature. When it’s too hot to touch (around 150°F or 65°C), stop steaming immediately. A thermometer provides precise control and prevents overheating, which can scorch the milk and diminish its sweetness.
6. Turn Off the Steam
Before removing the wand, turn off the steam to avoid splattering. Set the jug down carefully to prevent spills.
Final Steps for Silky Microfoam
Tap and Swirl the Milk
After steaming, tap the jug gently on the counter and swirl it to eliminate any remaining bubbles. This ensures a smooth and glossy texture.
Clean the Steam Wand
Always wipe the wand with a damp cloth and purge it after use. Regular cleaning prevents milk residue buildup, which can clog the wand and affect performance.
Pour the Milk
To pour, tilt your coffee cup slightly and pour the milk from a height to mix it with the espresso. Lower the jug as you finish to create latte art. Don’t be discouraged if your designs aren’t perfect—practice makes progress!
Expert Tips for Success
1. Practice Consistently
Perfecting your milk steaming technique takes time. Adjust your approach based on the type of milk you use, and learn from each attempt.
2. Use Fresh Milk
Fresh milk is key to quality foam. Avoid milk nearing its expiration date, as it may not froth properly.
3. Experiment with Milk Types
While whole milk delivers the best results, try barista-grade plant-based options like oat milk for variety.

Common Mistakes to Avoid
Over-Aerating Milk
Introducing too much air creates large, frothy bubbles. Aim for a gentle hissing sound and stop aerating after a few seconds.
Overheating the Milk
Milk burns above 170°F (77°C), losing its sweetness and acquiring a scorched taste. Always monitor the temperature closely.
Skipping Cleaning Steps
Neglecting to purge and clean the steam wand can lead to clogs and reduced performance. Always clean the wand after each use.
Exploring Latte Art
Once you’ve mastered steaming, try creating latte art. Start with simple shapes like hearts or rosettas. Patience and practice are essential to improving your designs.
Steaming Milk on the Breville Barista Express: A Conclusion
Mastering milk steaming with the Breville Barista Express transforms your home coffee experience. With the right technique and a bit of practice, you can achieve silky microfoam that elevates your lattes and cappuccinos.
Whether you’re a casual coffee lover or an aspiring latte artist, the Breville Barista Express and a well-executed steaming process will ensure every cup is a masterpiece. So, fire up your machine, grab your milk jug, and get started on your journey to café-quality coffee at home.
FAQ
Q: Why is my milk full of large bubbles?
A: Over-aerating or positioning the steam wand too close to the surface can create large bubbles. Adjust the wand’s depth and reduce aeration time.
Q: What type of milk is best for steaming?
A: Whole milk is ideal for its fat content, but barista-grade oat milk is a great non-dairy alternative.
Q: How do I know when the milk is at the right temperature?
A: Feel the jug; when it’s too hot to hold for more than a second, it’s ready. A thermometer can help for precise measurement.
Q: Why should I purge the steam wand?
A: Purging removes condensation and milk residue, ensuring optimal steam quality and preventing clogs.
Q: Can I use plant-based milk for latte art?
A: Yes, barista-style oat and almond milk are suitable for creating microfoam and latte art.